A Buyers Guide for RTA Bathroom Cabinets
Introduction
Whether you're embarking on a complete bathroom remodel or simply looking to upgrade your space, choosing suitable cabinets is essential for achieving functionality and style. In this guide on bathroom remodeling, we'll take you through the process of selecting the perfect RTA (Ready-to-Assemble) cabinets for your bathroom and provide expert tips on styling them to create a cohesive and visually appealing look. From modern minimalist designs to classic and timeless options, we'll cover everything you need to know to transform your bathroom into a sanctuary of comfort and elegance.
Why Choose RTA Bathroom Cabinets?
Ready to assemble bathroom cabinets are an excellent choice for a bathroom renovation, as there are numerous benefits to their design. One of the primary benefits is their convenience and ease of assembly. Unlike traditional pre-assembled cabinets, these are shipped in flat-packed boxes, making them much easier to transport and place, especially in tight spaces like bathrooms. This also results in lower shipping costs and reduced chances of damage during transit. Furthermore, RTA bathroom cabinets come in a wide range of styles, finishes, configurations, and bathroom cabinet sizes, providing ample options to customize the bathroom design according to their preferences and decor schemes.
Budget-Friendly Bathroom Remodels with RTA Cabinets
- Beautiful Black and White Bathroom
- French Farmhouse Style Bathroom
- Warm Bohemian Style Bathroom
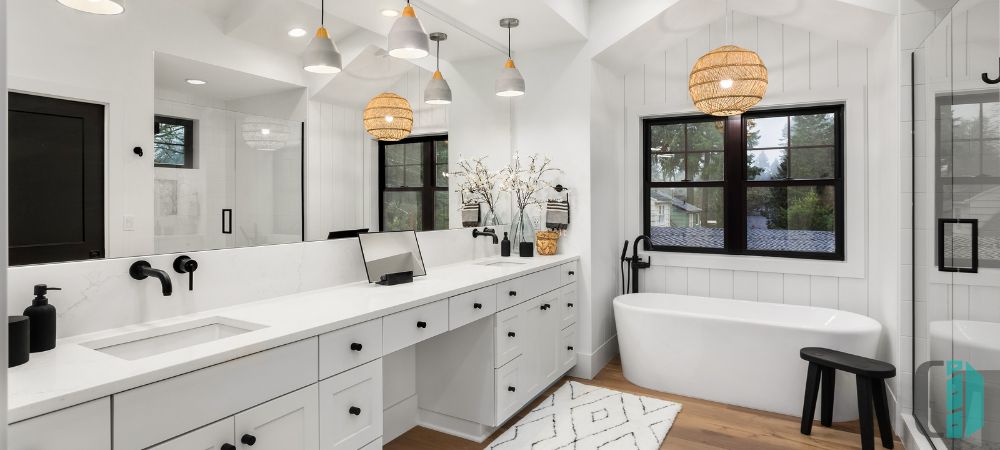

The white shaker cabinetry, adorned with sleek matte black hardware, adds a touch of classic charm while maintaining a contemporary edge. The contrast between the crisp white cabinetry and the matte black hardware creates a striking visual impact, elevating the space's overall aesthetic. Additionally, white cabinetry helps brighten and visually expand the room, making it feel airy and inviting.
The glass walk-in shower is a focal point of luxury and functionality in the renovated bathroom. Its transparent design creates an open and spacious feel and allows natural light to penetrate the space, enhancing the overall ambiance. The built-in shower nook provides practical storage for toiletries and bath essentials, keeping the shower area clutter-free and organized. This thoughtful addition maximizes style and functionality, creating a seamless and cohesive design.
Neutral patterned tile adorns the walls and floors of the bathroom, adding texture and visual interest to the space. The subtle pattern adds depth and dimension to the design while maintaining a sense of sophistication and refinement. The neutral color palette of the tile complements the white cabinetry and black hardware, creating a cohesive and harmonious look that exudes understated luxury.
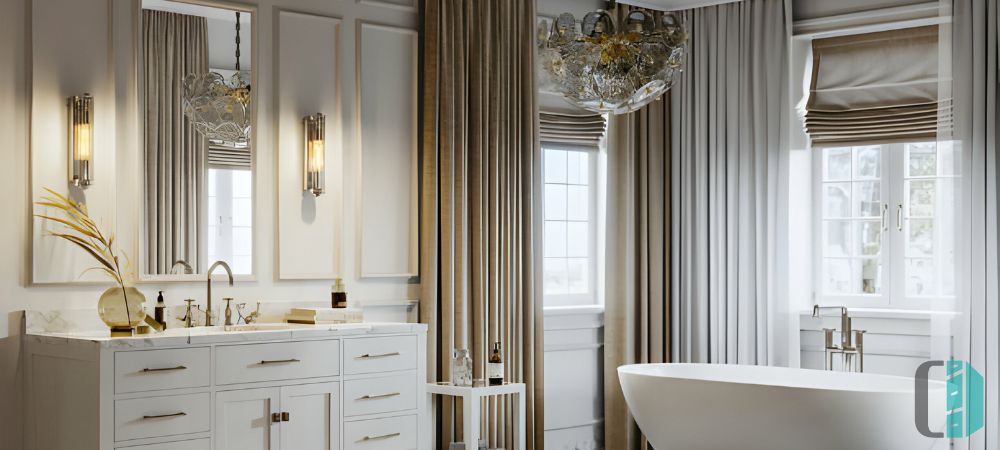
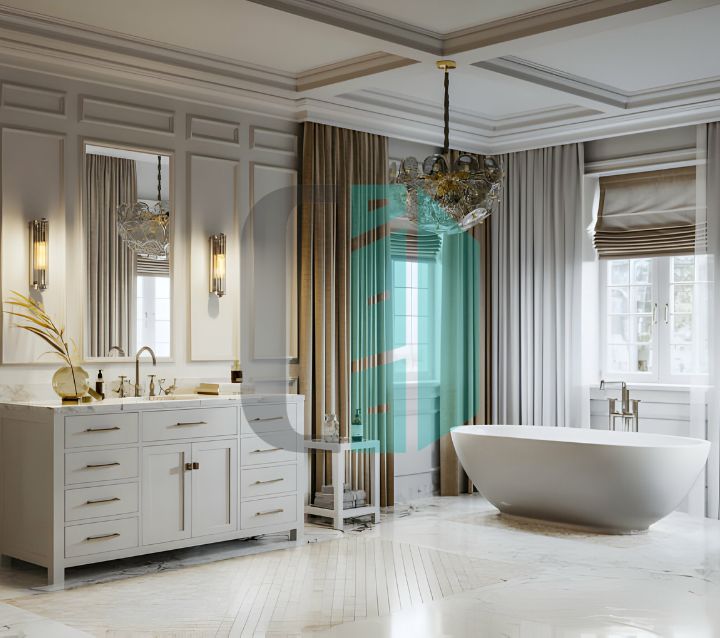
The charm and elegance of French farmhouse design with carefully selected elements evoke a sense of timeless sophistication. This space's focal point is the free-standing clawfoot tub, which serves as a nod to vintage luxury and adds a touch of old-world charm. Paired with glacier-white bathroom cabinets adorned with brushed nickel hardware, the design balances rustic simplicity and refined elegance.
Large vanity mirrors with feminine and elegant frames add to the luxury and sophistication of the design. These mirrors enhance the space's functionality and reflect natural light, making the room feel bright and airy. Combining these elements creates a cohesive design that exudes the warmth and character of a French farmhouse, blending rustic charm with timeless elegance. With its carefully curated elements and thoughtful attention to detail, this bathroom renovation captures the essence of French farmhouse style, providing a serene and inviting retreat reminiscent of a countryside estate.
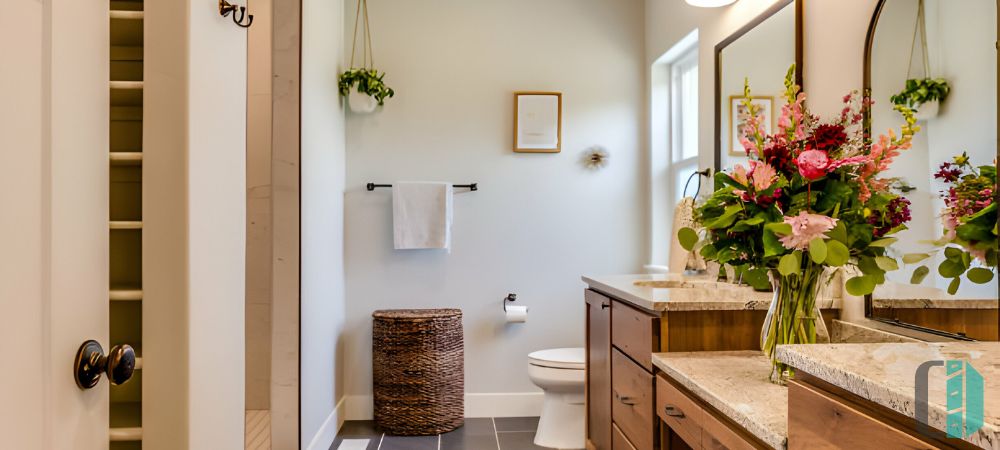

This bathroom renovation epitomizes modern elegance and functionality with its innovative design elements. Incorporating open shelving into a floating bathroom vanity adds a contemporary flair and maximizes storage space while maintaining an airy, open feel. These shelves are perfect for showcasing decorative accents or storing daily items within easy reach. Additionally, ledges strategically placed throughout the space offer extra storage for towels, toiletries, and other bathroom essentials, ensuring a clutter-free environment.
A vessel sink is a focal point of luxury and style, adding a touch of elegance to the space. Its elevated position atop the vanity creates a dramatic visual impact while maximizing countertop space. The combination of stone and marble walls further enhances the luxurious ambiance of the bathroom, creating a warm and inviting atmosphere. This bathroom renovation perfectly balances style and functionality, incorporating innovative design elements to create a visually stunning and practical space.
Choosing the Right RTA Cabinets for Your Bathroom
Choosing suitable RTA cabinets involves carefully considering several factors to ensure they meet both your functional needs and aesthetic preferences. Firstly, it's essential to determine the style of cabinets that best suits your decor. Whether you prefer modern, minimalist design or classic and timeless styles, there's a cabinet style to match every taste.
Ordering the correct bathroom vanity cabinet dimensions is crucial to a well-done bathroom remodel. The precise dimensions will vary depending on the door style and square footage you have to work with. On average, the cabinets are 24-48 inches wide, 20 inches deep, and 30 inches tall. On average, bathroom cabinet height is 30-32 inches. Measure the available space in your bathroom carefully to ensure the cabinets fit seamlessly without overcrowding the room or obstructing traffic flow. Consider the cabinets' dimensions, including width, depth, and height, and any additional features, such as drawers or shelves, to maximize storage while maintaining functionality.
Lastly, remember to factor in your budget when choosing bathroom cabinets. While RTA cabinets are often more affordable than pre-assembled options, prices vary depending on the materials, style, and brand. Set a budget beforehand and stick to it throughout the process.
Step-By-Step RTA Bathroom Cabinets Guide to Assembly
Assembling RTA (Ready-to-Assemble) bathroom cabinets is a straightforward process that can be completed with essential tools and patience. Upon arrival, ensure you have the correct bathroom vanity cabinet dimensions. Inspect every piece of cabinetry to ensure that you have received the bathroom cabinet height and bathroom cabinet sizes that you ordered. Follow these step-by-step instructions to assemble your RTA bathroom cabinets:
- Prepare Your Work Area: Clear a flat, spacious area where you can lay out all the cabinet components. Ensure you have enough room to move around comfortably and access the necessary tools.
- Review the Instructions: Carefully read the assembly instructions provided by the manufacturer. Familiarize yourself with the different components of the cabinet and the order in which they need to be assembled.
- Gather Tools and Materials: Collect all the tools and materials needed for assembly, including a screwdriver or power drill with appropriate bits, a rubber mallet or hammer, and any included hardware such as screws and cam locks.
- Sort and Organize Components: Lay out all the cabinet components and hardware, sorting them by type and size. This will make it easier to locate the necessary parts as you assemble the cabinets.
- Follow the Assembly Sequence: Begin assembling the cabinets according to the sequence outlined in the instructions. This typically involves starting with the cabinet frame and attaching the sides, back, and bottom panels using screws or cam locks.
- Attach Drawer Glides and Hinges: If your cabinets include drawers or doors, install the drawer glides and hinges according to the manufacturer's instructions. Use a screwdriver or power drill to attach these components to the cabinet frame securely.
- Install Shelves and Dividers: Insert any included shelves or dividers into the cabinet, adjusting them to the desired height or configuration. Secure them in place using screws or shelf pins as specified in the instructions.
- Adjust and Level: Once the cabinet is fully assembled, check for any loose screws or misaligned components. Use a screwdriver to tighten any loose hardware, and adjust the cabinet feet or leveling legs to ensure they sit level on the floor.
- Check for Functionality: Test the functionality of any drawers or doors by opening and closing them several times. Ensure they operate smoothly and without any obstructions.
- Install Cabinets in Bathroom: Once assembled, carefully move the cabinets into your bathroom and secure them in place according to the manufacturer's recommendations. Use a level to ensure they are correctly aligned and secure them to the wall or floor as necessary.
While assembling RTA (Ready-to-Assemble) bathroom cabinets is generally straightforward, there are some common challenges that you may encounter during the process.:
- Complex Instructions: Some RTA cabinet kits come with instructions that may need to be clarified or better written, making it challenging to follow the assembly process accurately. Take your time to carefully review the instructions and seek clarification if needed before proceeding with assembly.
- Alignment Issues: Proper alignment during assembly can be challenging, especially when joining multiple panels or attaching hinges and drawer glides. Misaligned components can affect the functionality and appearance of the cabinets. Take care to follow the assembly sequence precisely and use a level to ensure that the cabinets are correctly aligned before tightening any screws or fasteners.
- Tight or Loose Connections: Tightening screws or cam locks too much or too little can result in either overly tight connections that may damage the panels or loose connections that compromise the structural integrity of the cabinets. Use caution when tightening hardware and follow the manufacturer's recommendations for torque specifications to achieve the optimal balance between stability and flexibility.
- Grab Needed Materials: Collect all the necessary materials for painting, including primer, paint in your desired color, paint brushes or rollers, sandpaper or a sanding block, painter's tape, drop cloths or newspaper to protect surfaces, and a clean cloth for wiping down the cabinets.
- Prep the Cabinets: Remove all hardware, such as knobs, handles, and hinges, from the cabinets. Use a screwdriver to remove these components. Place them in labeled bags or containers to keep them organized for reinstallation later.
- Clean and Sand: Thoroughly clean the surfaces of the cabinets with a mild detergent and water solution to scrub away any dirt, grease, or residue. Once dry, lightly sand the surfaces with fine-grit sandpaper to create a slightly rough texture to help the primer and paint adhere better.
- Apply Primer: Using a high-quality primer suitable for the cabinet material (wood, laminate, etc.), apply a thin and even coat to the surfaces of the cabinets using a paint roller. Let the primer dry completely before proceeding.
- Apply Paint: Stir the paint thoroughly to ensure it is well-mixed. Using a clean paintbrush or roller, apply the first coat of paint to the cabinets in smooth, even strokes. Be sure to let the first coat dry before applying more coats as needed for full coverage and desired color intensity. Follow the drying times specified on the paint can between coats.
- Optional Techniques: Get creative with your painting technique to achieve a unique look. Consider using techniques such as distressing, antiquing, or stenciling to add visual interest to the cabinets.
- Reattach Hardware: Once the final coat of paint is dry, reattach the hardware to the cabinets using the screws or hardware provided. Ensure the hardware is securely attached and properly aligned for a polished finish.
- Optional Finishing Touches: Consider adding additional finishing touches, such as decorative knobs or handles, to customize the cabinets to your style preferences further.
- Clean Routinely: Dust and dirt can accumulate on cabinet surfaces over time, so cleaning them often with a soft cloth or microfiber duster is essential. For stubborn stains or spills, use a mild detergent, water, and vinegar to clean the surfaces gently. Avoid harsh chemical-based cleaners, as they can damage the finish of the cabinets.
- Protect from Heat and Sunlight: Direct exposure to extreme heat sources such as stovetops, ovens, or dishwashers can cause damage to the finish of RTA cabinets over time. Similarly, prolonged exposure to sunlight can fade or discolor the cabinet surfaces. Protect cabinets from heat and sunlight by using heat-resistant mats or curtains to shield them from direct exposure.
- Use Cabinet Liners: Consider using cabinet liners or shelf liners to protect the interior surfaces of the cabinets from scratches, spills, and stains. Liners also make it easier to clean up spills and provide additional cushioning for delicate items.
- Avoid Excessive Weight: Overloading cabinets with heavy items can stress the shelves and hinges, leading to damage or warping over time. Be mindful of the weight capacity of your cabinets and distribute heavy items evenly to prevent overloading.
- Protect Cabinet Doors and Drawers: Avoid slamming cabinet doors and drawers shut to prevent scratches and dents. Use soft-close hinges and drawer glides if available, or install door bumpers or cushions to cushion the impact and reduce noise.
Maximize Storage with Organization Bathroom Cabinets
Organization bathroom cabinets are the key to a highly functional bathroom that doesn’t look cluttered, especially when working with a small bathroom space. When it comes to optimizing storage and enhancing the design of your bathroom, there are numerous bathroom cabinet ideas to consider. Utilizing the space underneath the bathroom vanity for towel storage is practical and space-efficient. This area can be outfitted with shelves or baskets to neatly store towels, keeping them within easy reach while maximizing vertical space. Narrow built-in shelving provides additional storage without taking up valuable floor space, perfect for storing toiletries, decorative accents, or even displaying folded towels. Adding a floating shelf below a modern floating bathroom vanity increases storage capacity and adds a sleek and contemporary touch to the space.
Incorporating a classic medicine cabinet offers both storage and functionality, providing a convenient place to store toiletries, prescriptions, and other essentials while keeping them organized and easily accessible. Pull-out storage is another ingenious solution for maximizing storage space in the bathroom, offering designated compartments for organizing body care products, skincare items, cosmetics, and extra bath linens. A hidden hamper discreetly conceals dirty laundry while keeping the bathroom tidy and clutter-free.
For a stylish design statement, consider pairing brass hardware and accessories with colorful tile or wallpaper to create visual interest and draw attention away from less desirable features. Opting for a small, stylish bathtub can add charm and character to the bathroom while saving space, perfect for creating a cozy and inviting atmosphere. Hanging shower curtains higher than usual adds a touch of elegance and creates the illusion of higher ceilings, making the bathroom appear more spacious and airy.
Finally, incorporating a glass walk-in shower can transform the bathroom into a luxurious retreat, creating an open and contemporary look and feel while maximizing natural light and showcasing beautiful tile work. By implementing these storage and design ideas, you can elevate your bathroom's functionality and aesthetics, creating a stylish and practical space.
DIY Painting Bathroom Cabinets & Customization Tips
Painting bathroom cabinets is an affordable and simple solution for customizing them to fit your vision perfectly. Follow this step-by-step guide to paint and customize RTA cabinets:
RTA Cabinet Cleaning Tips and Tricks
Keeping RTA (Ready-to-Assemble) cabinets in excellent condition for the long term requires regular maintenance and proper care. Here are some practical tips to help preserve the quality and appearance of your RTA cabinets:
Why Partner with Cabinet Distribution?
At Cabinet Distribution, we’re all about giving you the best product possible. Our cabinets are always priced well, but we don’t sacrifice quality to give you these prices. Unsure about which cabinets would look the best in your home? You can order easily-refundable samples to try them out before you commit to anything. If you need extra reassurance that you’re picking the right cabinet, check out our Free Online Kitchen Design. And once you’ve found your perfect cabinets, they’ll arrive promptly because we ship our cabinets within 3 business days of your order. Check out our website to learn more, and see the fantastic cabinet selection we offer.
Conclusion
RTA bathroom cabinets offer a convenient, cost-effective solution for upgrading your bathroom. Following the tips outlined in this guide on bathroom remodeling, the perfect cabinets that meet your functional needs and enhance your space's overall aesthetic can be chosen. Consider style, size, material, and budget when choosing your cabinets. Don't hesitate to get creative with your styling to personalize your bathroom and make it your own. With suitable RTA cabinets and creativity, you can achieve a bathroom with practicality and style, providing a relaxing and inviting space for years to come.


